All occasion card · paper piercing · scrapbook page layout · SOTM

The long way home Australasian blog hop

blogbadgeHello and welcome aboard the CTMH June 2016 SOTM Australasian blog hop. If you have landed here from Vandra’s Virtual Craft Room then you have arrived at the right spot. If you stumbled upon this by accident then never fear just click on the link at the end of this post to continue the hop to all the other fantastic ideas.

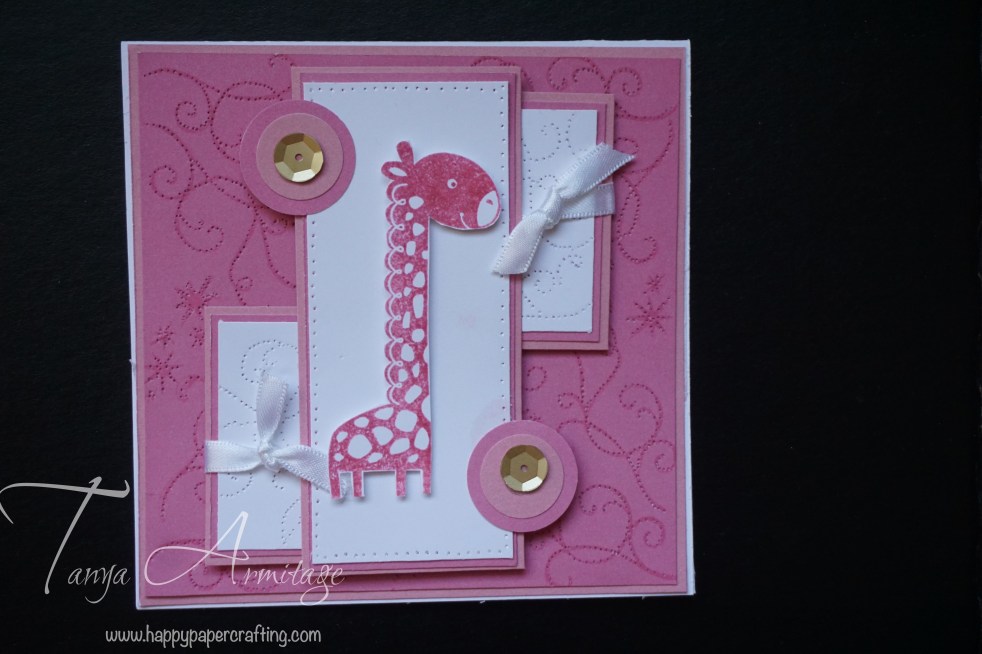
Every month CTMH release a stamp set just for that month. The Stamp set available for June is The long way home. It is a cute fun stamp that you will see on this hop is very versatile. Screen Shot 2016-05-31 at 11.22.36 pm

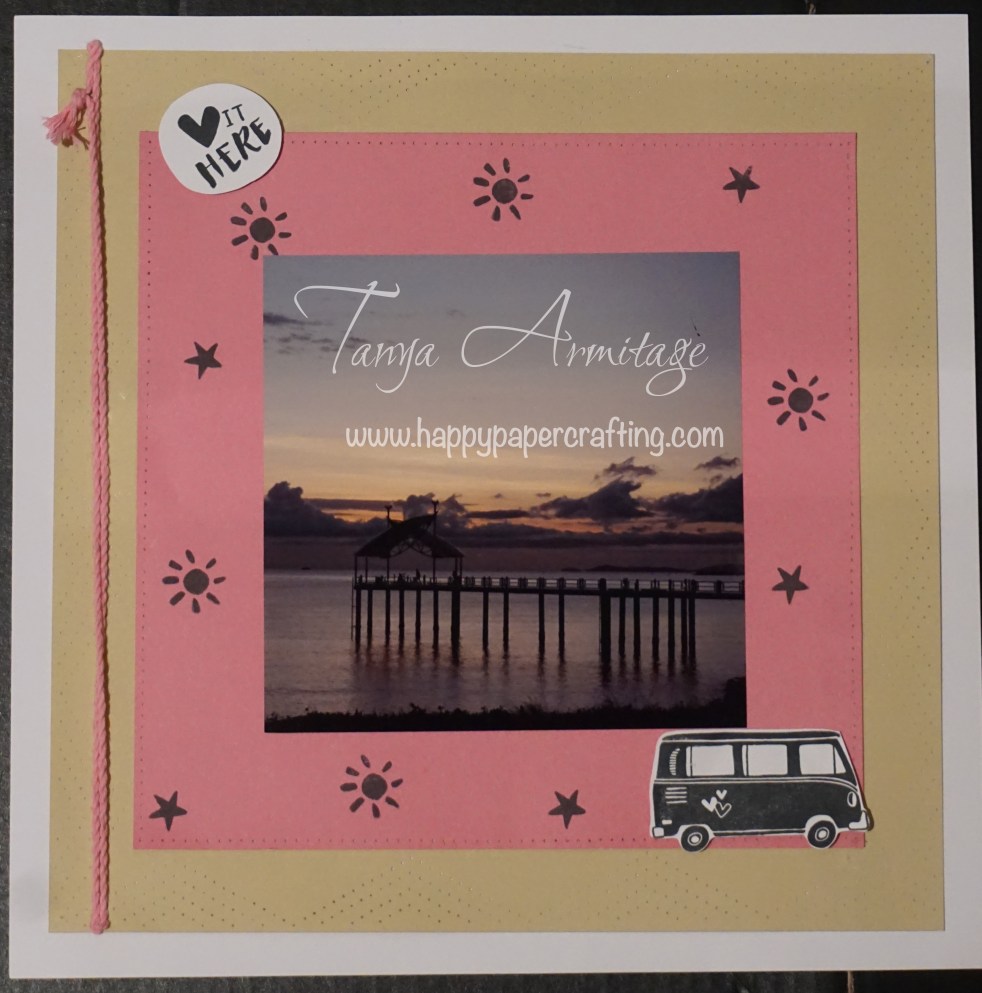
The idea I will be sharing with you today is a simple page layout inspired by page 63 from the Reflections how to book. I live in tropical North Queensland and one of our local beaches has great views at sunrise. I love living here and thought I would document what I love about my home town so that my future family can see what I love about it and how it changes. I would love to see your home town featured on your page.

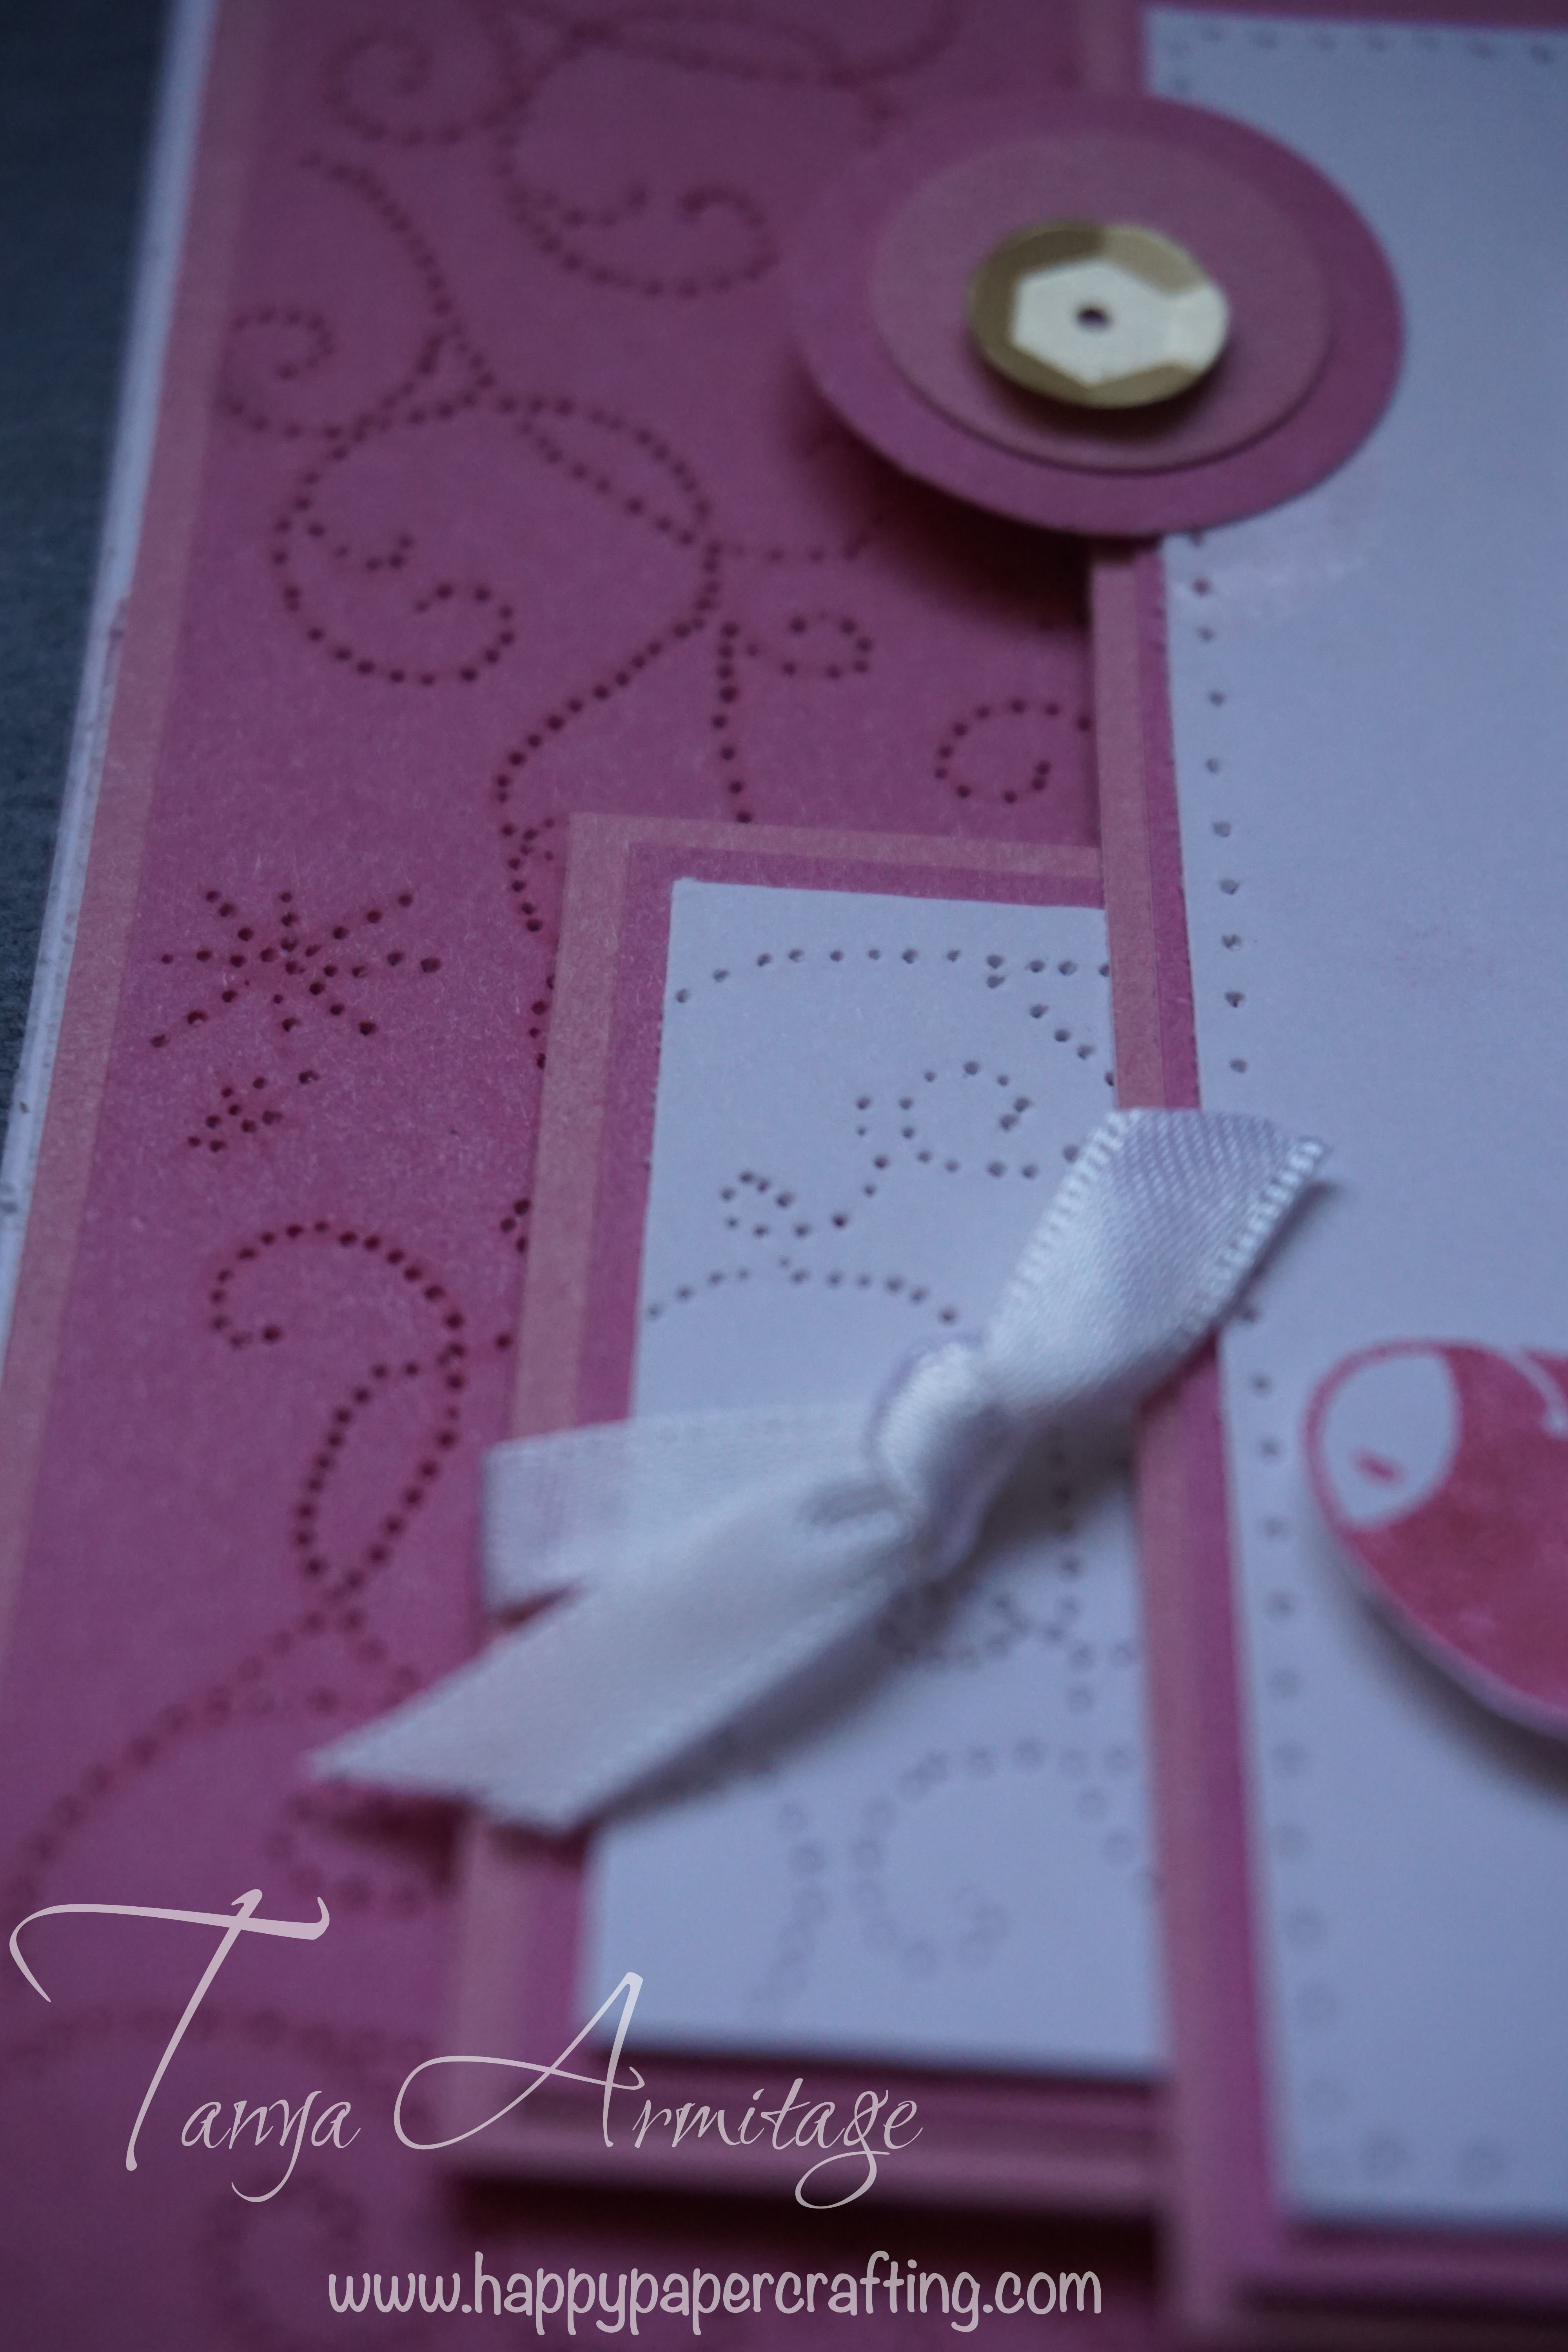
I chose not to use a pattern paper for the background but did not want to use plain colour. So I created a bit of texture with the Stitch Guide and Piercing and Embossing tool. I used the triangle to create a fun pattern in the background card stock. I also pierced a border on photo mat with the piercing tool. This is a tool I love so much and have done a few projects using it to create fun backgrounds. Take a look here and hereJune16 SOTM piercing closeup.jpg

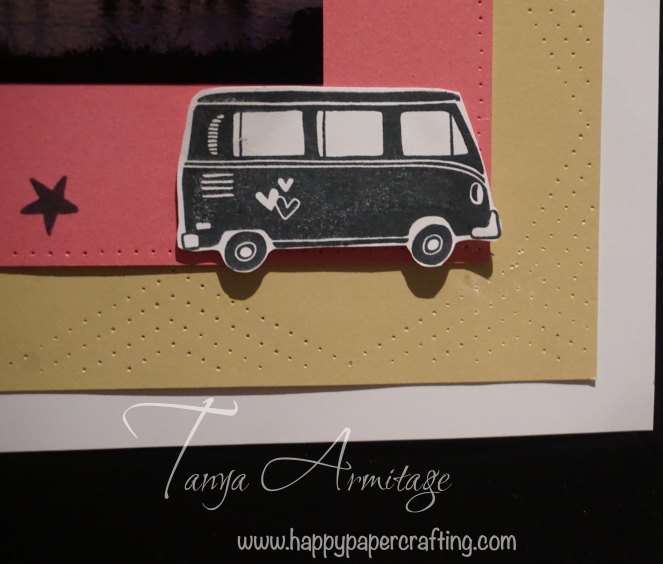
This is a very simple layout and is quick to do. I have stamped the sentiment Love it here  and the combi van and attached to my project with 3d foam tape. Then sun and star have been stamped onto the project. I have then finished the project off by attaching a strip of Twine. June16 SOTM page

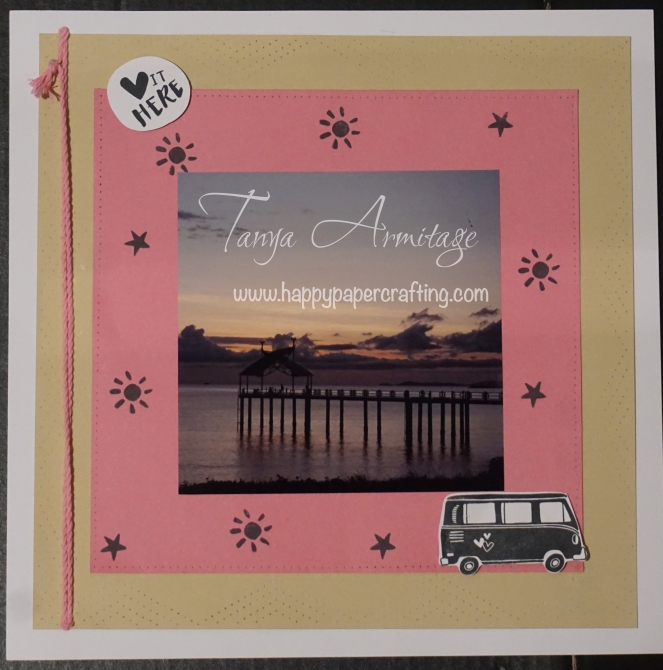
I hope you have like this simple project and give it a go. Please feel free to share your page showing what you love about your home town. It would be great to see all the wonderful parts of our country.

This stamp set is $27 if purchased alone or just $7.50 with a qualifying purchase of $75.

Contact your consultant for more information or contact me here.

Remember this stamp set is only available until June 30 so be sure to grab this awesome stamp set before the time gets away.

Please leave a comment before continuing on to Creating with Kara Davies whom I am sure will have a fantastic idea to share.

Thank you for taking the time to look at my page idea. Enjoy the rest of the Blog Hop and Happy Paper Crafting

Tanya Armitage

tanya.armitage@me.com

Online Business Address <——–click here


Advertisement
All occasion card · Cards · paper piercing

Stampaganza Australasian blog hop

blogbadge

Hello and welcome aboard our Australasian Close to My Heart Blog Hop.

If you have arrived here from Jenny’s blog The Creative Heart then you are in the right place. If you are starting the hop from here no problem, please join in by following the link at the end of this post.

Today I would like to share with you a card using 2 stamp sets. During the month of March 2016 CTMH has stampaganza happening. When you purchase two stamp sets you will get a 3rd set Free.

For those who do not know me I will give you a little insight into my 3 fav things to do on projects. If there is a flower I love to emboss them, if there is a butterfly I love to lift the wings for the 3D look and the third is to create my own background/paper. Today I will show you a card that I have made and created my own background/paper.

I got inspired for this card by Pinterest. I saw an image there that used a stitch stamp and wanted to get a similar look.

To start with using tone on tone stamping, I have stamped the Princess wings scroll work and stars on the background card stock. On the two smaller white card stock I have stamped using Versamark ink. I did this so that I could still see the lines but would not be clearly visible on the finished product.

I have then paper pierced the stamped designs and the edge of the long white card stock. I did this free hand following the lines of the images. By piercing close together it allows the eye to follow the line and maintain the image. Yes this is a little bit fiddly but I actually found it quite relaxing to pierce the paper. (A bit of paper therapy for you). Here is a closer look at the piercing. Close up of paper piecing for background

I have stamped the giraffe from Wild Wonders Stamp set with Pigment ink and then clear embossed it. This gives it the glossy sheen and makes it bright as the centre piece of the card. I have decorated it with ribbon and Gold Sequins. I have double mounted the card stock. I Quite liked the look of the different tones of pink in this card. I hope you liked the finished product.

CTMH baby girl card with paper pierced background


If you would like to see another card using the same technique take a look at this post here.

Stampaganza expires on March 31 2016 so be sure to place your order with your consultant quick. If you do not have a consultant please contact me or place your order on my OBA.

Please leave a comment before continuing the hop to Vandra’s virtual CTMH craft room.

If you are interested in either a full video or written instructions please contact me

Thank you and Happy Paper crafting everyone.

Tanya

Tanya armitage

tanya.armitage@me.com

0407581163

All occasion card · Cards · Embossing · paper piercing

Paper Pierced Background card

Hello Everyone. I created this card after reading the close to my heart blog. They have a competition running at the moment. This is what I created. If you want to participate you can read all about it here.


I was inspired for this card by a 2008 card by Amy Sheffer on pinterest. The card featured a stamp that had stitching design background stamp. I loved the look but didn’t have a stamp similar in my collection for this project. So I thought outside the box and came up with this solution.

#cards4jeanette

I first used the Tone on Tone stamping technique on the cotton candy card stock. To stamp on the Daisy White card stock I stamped in versa mark. This was so that it was clear and not so visible on the final product. I used the  Great Job stamp set for the background.

Once it was stamped I then used the Piercing and Embossing Tool to pierce the design on the card stock. I followed the edges of the design for piercing. I also pierced a border along the edge of the larger Daisy White card.

I then Stamped the flowers from the Woodland Romance stamp set on both cotton candy and Daisy White scraps using Memento Ink. I used Memento ink as it dries fast so when I wanted to emboss straight after I wouldn’t damage the image. I then fussy cut the flowers out. To ensure the flowers would easily emboss I cut the petals down to the inner circle of the image. Turning the flowers upside down I used the embossing end of the Piercing and Embossing Tool. I pressed hard on each edge of the petal as well as the centre of each petal. I then turned them right side up and doing small circle motions got the flower to turn up. I then layered two alternate colours together using Liquid Glass.

I then stamped the Happy Birthday sentiment from the Joyful Birthday stamp set on the large white card. The flowers were then arranged and adhered to how I felt look right. I attached ribbon to the two smaller white card pieces and assembled the card.

This month we have Stampganza happening. If you purchase and 2 stamp set you will receive a 3rd for FREE.1603-cc-stampaganza

If you purchased all three stamps used for this project you would receive the Joyful Birthday stamp set of free.

Thank you for looking at this card. I am looking forward to seeing what you create for #cards4jeanette. I hope you all try these fun techniques

Full instructions are available for any of my projects with a purchase from my OBA.

Tanya Armitage

0407581163

tanya.armitage@me.com