All occasion card · Mini Album · Off the Page · SOTM

S1711 Through The Year CTMH Stamp Of The Month Australasian Blog Hop

blogbadge

Hi and welcome aboard the CTMH Australasian blog hop. If you have arrived here from Creative Workshops by Rachel Stribling then you are in the right place. If you have joined us from this post don’t worry just click the link at the bottom of my post when you are finished and join the ride of amazing ideas.

Today I will be sharing an idea that jumped straight into my head when I saw November 2017 Stamp of the Month: Through The Year. I absolutely love the font used for the months in this set. I am a huge fan of script fonts. The great thing is it is only $7.50 with a qualifying order during the month of November.Screen Shot 2017-11-01 at 12.12.40 am

I know most of you will be thinking how often will I use this stamp set. However the Ideas shared today along the blog hop and the twists you can do on my design will have you using this stamp for many gifts all year round.

When I saw this stamp I wanted to decide how I was thinking of different ways I would use it. I know you could use it on frames for school pics or scrapbook layouts. However I though I would personally use it like a journal. I find If I set myself a goal and a time line I will strive to achieve it more than just an idea/wish. So I decided to create a mini album that has fold out pages. I decided to keep it small and have each side of card stock a different month.

To make this album you will need the following products.

  1. 3 sheets of Coloured Card Stock
  2. 1 sheet of B&T Paper (I used Basic Fudamentals which are at 30% saving for November)
  3. 1 sheet of White Daisy Card Stock
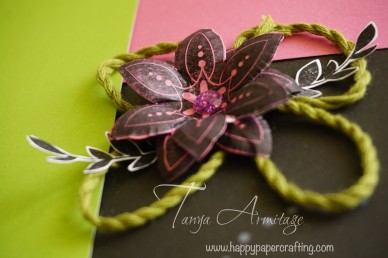
  4. Glitter cardstock, ribbon, shimmer Trim or anything you wish to embellish the project
  5. Ribbon or clip rings to join.

s1711mini album front cover

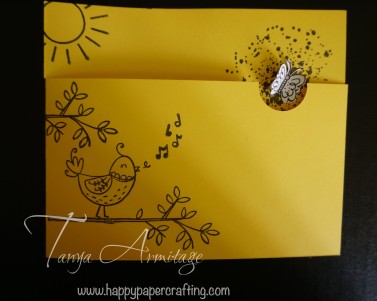
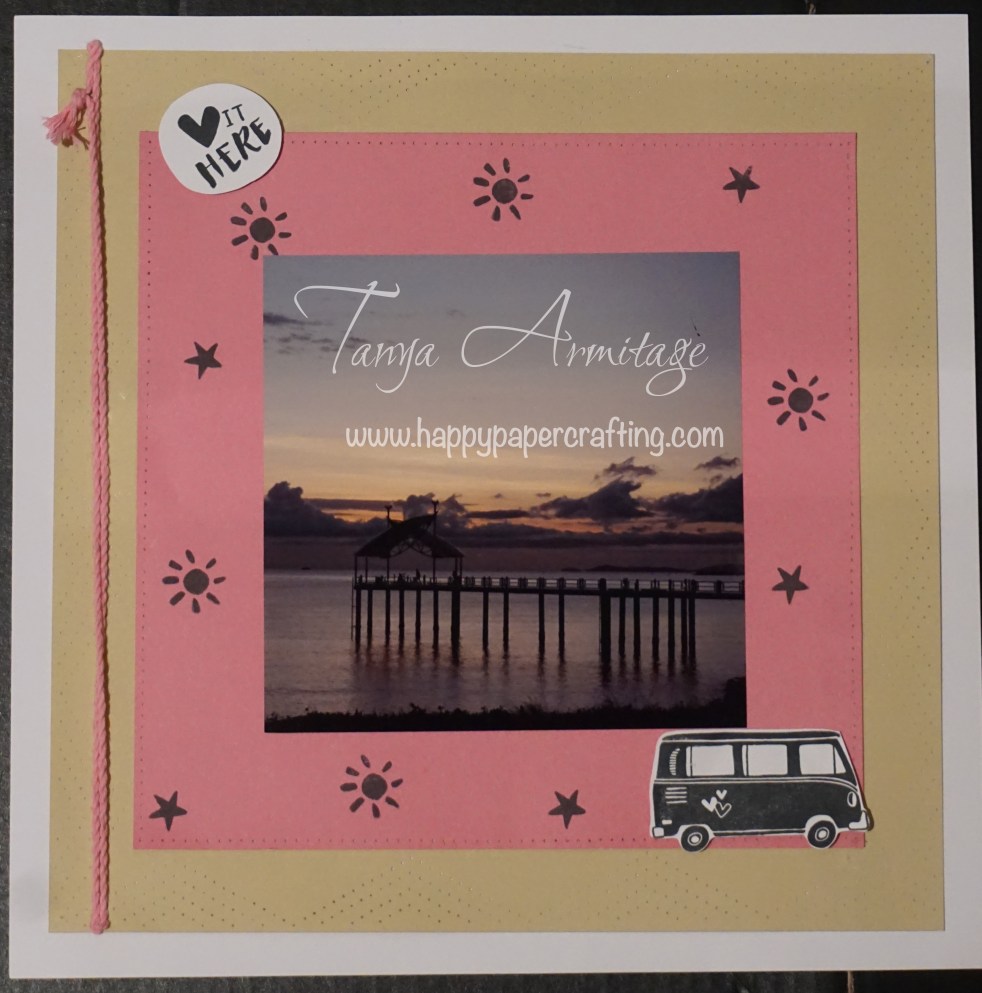
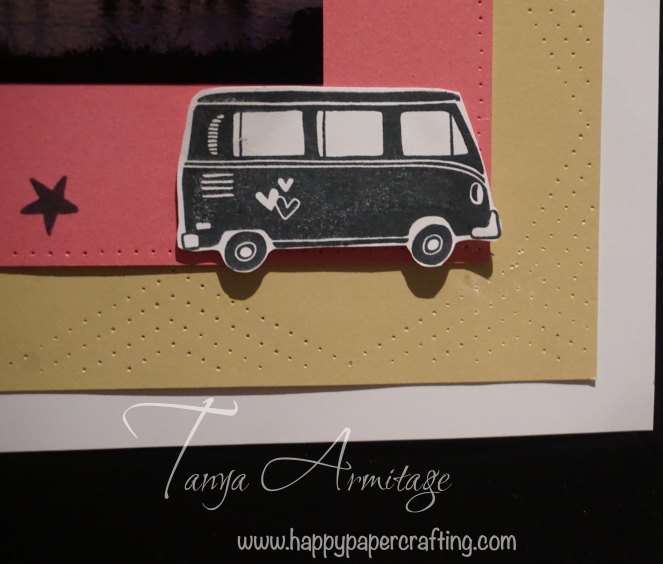
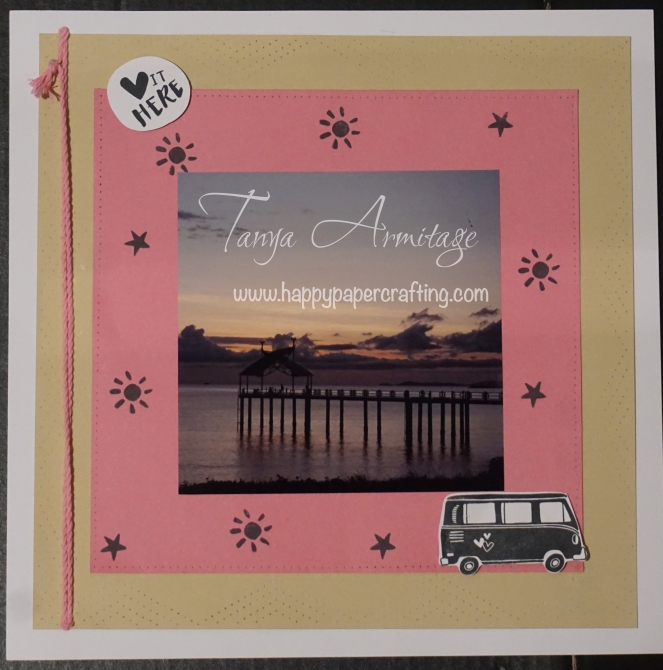
The front cover I decorated last and have used a image from the new You Are Here Cricut cartridge.

You will need to cut 6- 3.25″x12″ strips and 1- 3.25″x10.5″ from the coloured Card Stock. Then cut 12- 3″x3″ squares from both the B&T paper and White Daisy Card stock. Then you will need to cut 12- 7/8″x3″ strips from the white daisy card stock.

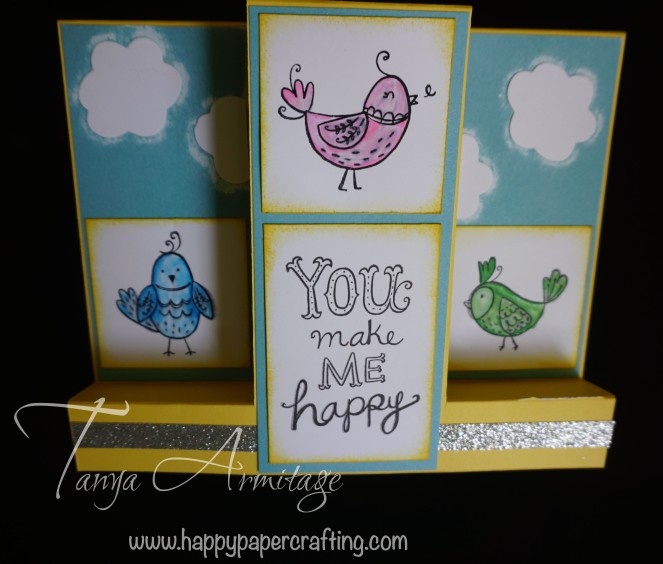
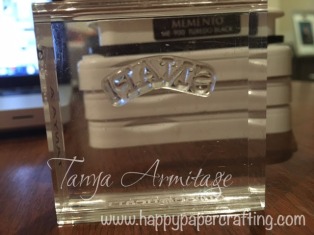
Stamp the months onto the 7/8″x3″ strips. I just stamped with Memento Ink. However,  you could also use versa mark and heat embossing powders.

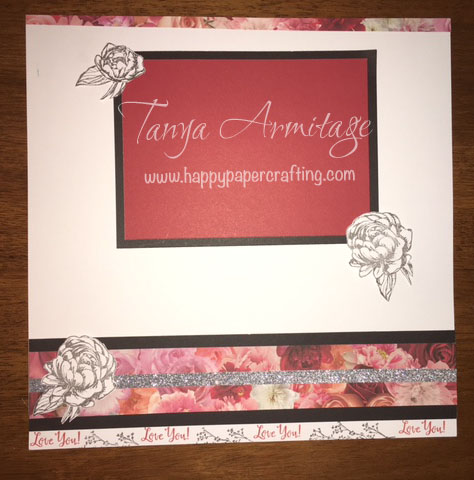
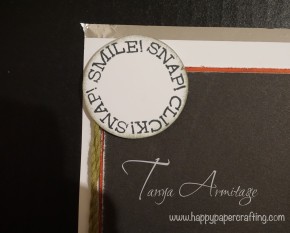
Score each of the 3.25″x12″ strips as follows. Score at 5/8″ then at 1.25″. Move that score line to 3.25″ and score. Move that score line to 3.25″ and score and again move that score line to 3.25″ and score. Using a bone folder fold the score lines. They should fold together so that the small score lines (the first two marks) are the binding and the other pieces fold behind each other. On one side glue the white 3×3 piece near the binding and on the opposite side adhere the white square to to the panel next to the Tab. Adhere the month to the tab. When folded it should look like the picture below.s1711mini album open views1711mini album centre

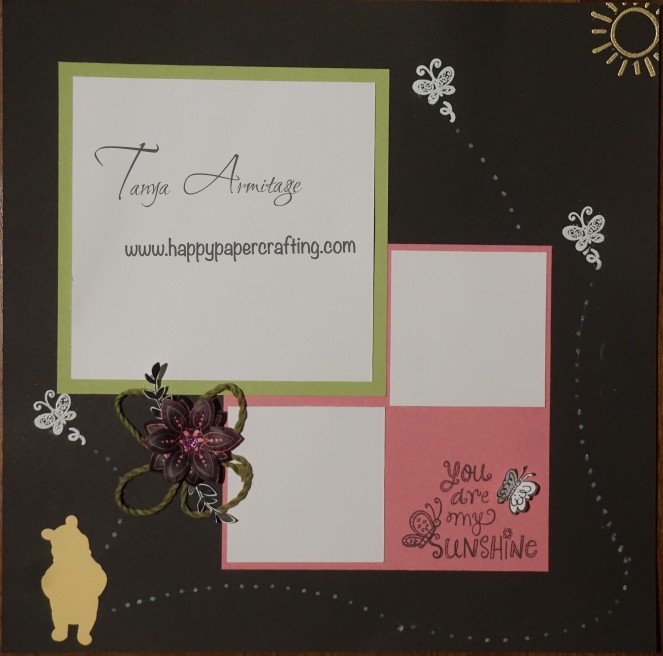
Adhere the 3×3 B&T paper to the middle panel. Then score the 3.25″x10.5″ piece at 4.5″, 5″, 5.5″ and 6″ marks. Using a hole punch, punch holes in the binding area to be able to assemble. I found it easiest to go from Top and Bottom of each piece trying to make sure it was in the middle of the Binding area. This allowed me to easily punch the cover piece and assemble. You can join them all together with clip rings or with Ribbon.

If you feel you want the binding to be sturdier you can add a little bit of liquid glass to the small folds.

That is the album assembled.

What I intend to do is have the front piece that is seen my wish/goal for the month. The middle piece is a mount so I can add a photo either of the completed challenge or something that happened instead. The last panel that is hidden is for journaling. I will write if I achieved it, when, and what problems may have risen during the challenge.

s1711mini album single extended page

The great thing about doing this album with the new card stock is the different shading of colours font and back. It allows for a nice mixture of colours and interest.

s1711mini album centre opens1711mini album centre image

If you do not wish to do this as a goals/new years resolution album, you could do the same design for a brag book for Grandma or Aunts. A photo of the grandchild every month and what they did.

You could also do a Birthday Book and keep track of when everyone’s Birthday’s are.

Teacher Thank you gifts. Record what they did or what you loved most every month with the teacher.

If you do use it for a goals book you could make your goals on exploring your local area or trying something new every month.

Thank you for looking at my design. I hope it is something you feel you can recreate and will give a try. Keep an eye on my blog as I will be posting more ideas for this album and techniques with the Cricut. Remember this stamp set is only available this month through your CTMH consultant. If you do not have a consultant you can contact me here to order yours.

Please continue along this fun blog hop to Passionate about pages and see the amazing idea that Shaunna has designed for you.

Enjoy the inspiration and Happy Paper Crafting everyone

Tanya

Advertisement
All occasion card · scrapbook page layout · SOTM

July SOTM ideas

Hi everyone I hope you are enjoying yourselves. I have been busy with my work and a friends wedding that I haven’t been able to do much crafting lately. As you know there is a different stamp available for each month only. The July Stamp of the Month is From the notebookScreen Shot 2016-07-04 at 3.07.57 pm

This stamp would be fantastic on any page layout or card. Also would be great for home made diaries. The following two ideas have been created by Close to My heart corporate office and aren’t they fantastic.

The different images layered/grouped together on the cover of the My creations black mini book look fantastic. Stamping the heart directly onto the paper background makes it look like the paper was printed with it on. The lined stamps make great journaling box that I am sure you will use over and over again in months to come.

There are so many different interactive page layouts and journal ideas around and in our how to books that I know this stamp will work very well with.

Remember this fantastic stamp set is only available during the month of July. You can purchase it for $27 by itself or you can receive it for the discounted price of $7.50 with a qualifying purchase. Take a look at my OBA for a few more great projects created combining this stamp set and the magical papers.

For more great ideas check out the following consultants blogs

Lauren Moore

Georgie Creates

DorisTaylor Creative Inspirations

Sandra’s Virtual Craft Room


Thank you all for taking a look. Please share your ideas with me on my FaceBook page 

Happy Papercrafting Everyone

Tanya


All occasion card · paper piercing · scrapbook page layout · SOTM

The long way home Australasian blog hop

blogbadgeHello and welcome aboard the CTMH June 2016 SOTM Australasian blog hop. If you have landed here from Vandra’s Virtual Craft Room then you have arrived at the right spot. If you stumbled upon this by accident then never fear just click on the link at the end of this post to continue the hop to all the other fantastic ideas.

Every month CTMH release a stamp set just for that month. The Stamp set available for June is The long way home. It is a cute fun stamp that you will see on this hop is very versatile. Screen Shot 2016-05-31 at 11.22.36 pm

The idea I will be sharing with you today is a simple page layout inspired by page 63 from the Reflections how to book. I live in tropical North Queensland and one of our local beaches has great views at sunrise. I love living here and thought I would document what I love about my home town so that my future family can see what I love about it and how it changes. I would love to see your home town featured on your page.

I chose not to use a pattern paper for the background but did not want to use plain colour. So I created a bit of texture with the Stitch Guide and Piercing and Embossing tool. I used the triangle to create a fun pattern in the background card stock. I also pierced a border on photo mat with the piercing tool. This is a tool I love so much and have done a few projects using it to create fun backgrounds. Take a look here and hereJune16 SOTM piercing closeup.jpg

This is a very simple layout and is quick to do. I have stamped the sentiment Love it here  and the combi van and attached to my project with 3d foam tape. Then sun and star have been stamped onto the project. I have then finished the project off by attaching a strip of Twine. June16 SOTM page

I hope you have like this simple project and give it a go. Please feel free to share your page showing what you love about your home town. It would be great to see all the wonderful parts of our country.

This stamp set is $27 if purchased alone or just $7.50 with a qualifying purchase of $75.

Contact your consultant for more information or contact me here.

Remember this stamp set is only available until June 30 so be sure to grab this awesome stamp set before the time gets away.

Please leave a comment before continuing on to Creating with Kara Davies whom I am sure will have a fantastic idea to share.

Thank you for taking the time to look at my page idea. Enjoy the rest of the Blog Hop and Happy Paper Crafting

Tanya Armitage

tanya.armitage@me.com

Online Business Address <——–click here


scrapbook page layout · SOTM

Life in Pictures Australasian blog hop

blogbadge

Hello and welcome aboard our Australasian Close to My Heart Blog Hop.

If you have arrived here from Creating with Kara then you are in the right place.

If you landed here by accident, no problem, please join in by following the link at the end of this post.

Today I would like to share with you a creation which features Close To My Heart’s Life In Pictures April 2016 Stamp of the Month.

Screen Shot 2016-03-31 at 10.40.01 pm

This stamp features different kind of camera’s and phrases. I was inspired for this page layout by the phrase life in pictures.

I thought as there are progression of camera’s I would style a layout that can be used for a birthday showcasing different stages in a life.


The basic design for this layout came from Reflections scrapbooking program book, Bottom Border 2a design.

I didn’t want to use any papers with this project so I used second generation stamping with the images to create my own background. I stamped with slate ink hoping to create a softer image.

I cut the film strip from the artiste cartridge at 3″. I used the inner pieces to stamp a camera image on. I then sanded all the card stock to create an antique/aged feel to the page. I also used the edge deserter to roughen up the large photo mat.distressed edge.jpg
The one thing I love about our stamps is the ability to manipulate them. You can see I have used the words both straight and curved. Curving the words allows them to follow the edge of the circle to create a different element to you designs.

curved stamped image.jpgcurve stamp
Here is a picture of how they can be manipulated and placed on your block.

I embellished the page using silver foil tape, sequins and Twine to create this final look.

life in pictures page idea

It can be yours for just $7.50 with a qualifying order of $75 or for $27.00 if ordered separately from your CTMH consultant.

If you do not have a consultant please contact me or place an order here.


I’d love you to leave a comment before heading off to the next stop, Doris Taylor Creative Inspirations. I am sure she will have some fantastic ideas to share with you.

All occasion card · Cards · Embossing · scrapbook page layout · SOTM · Thin Cuts

Sunshine Birdies March CTMH SOTM blog hop.

blogbadge

Hello and welcome aboard our Australasian Close to My Heart Blog Hop.

If you have arrived here from Vandra’s virtual CTMH craft room then you are in the right place.

If you landed here by accident, or from my links, no problem, please join in by following the link at the end of this post.
March2016SOTMToday I would like to share with you a creation which features Close To My Heart’s March 2016 Stamp of the Month.


I have three projects to share with you today using this cute stamp set.


The first card I kept simple.  I have used a 5″x12″ piece of card scored at 6″. I have then cut from the front of the card 1 1/2″ off from the top. I have then used the 1 Inch circle punch to cut a semi circle in the the card. I then stamped the images I wanted onto the front and top of the card. I stamped on daisy white a butterfly and then hand cut it. I used the Ink Blot stamp set behind where I wished to place the butterfly. I have then using liquid glass glued the body of the butterfly to the card. This is the finished product. I know it is simple and plain but is a great quick and fun card to do with the kids.

march SOTM beginners

The next card I made is a step card. I have coloured the birds in with ShinHan touch markers. To create the clouds I used the Springtime wishes Thincuts. I placed the thin cut under the card stock and then using the sanding tool sanded the shape into the card stock. I then used the same thin cut to cut out a piece of daisy white to look like a cloud. I found doing this made a great outline and made them pop and looked fluffy. The one thing I love about this thin cut set is you can use your imagination to make them into other shapes. I then finished this card off with a trim of Silver Shimmer Trim. Here is the finished product. If you would like a detailed instruction guide then please contact me.march sotm step card copy

When I first saw this stamp set the butterfly at the top jumped out at me. I then thought of Winnie the Pooh and the the buzzing bees. So I had to create a fun page using it for photos of my friends youngest. As I used Black card stock for the page I used gold embossing powder for the sun stamp and White embossing powder for the butterflies to ensure they stood out. I traced and cut out the Winnie the Pooh and then using a handmade template I sponged white pigment ink to form the dots leading to the butterflies. I have stamped the sentiment on the page and added the butterfly to ‘S. I love how our stamps are clear. It makes lining them up to do this so much easier than the old red rubber stamps.

If you have seen any of my previous posts. I can’t have a butterfly flat on the page. So again I have cut out a butterfly and glued the body down allowing the wings to have a 3d effect. March SOTM single pagemarch sotm flower close copy


I have added more dimension to this page by adding an embossed flower, leaves and twine. Here is a close up of the element.


Thank you for taking the time to read my post. I hope you are inspired to do some of the ideas.

This exclusive Sunshine Birdies stamp is only available during March 2016.

It can be yours for just $7.50 with a qualifying order of $75 or for $27 if ordered separately from your CTMH consultant.

If you do not have a consultant please contact me or place an order here Tanya Armitage CTMH page.

I would love for you to leave me feedback before moving on to Shaunna’s Passionate about pages. Don’t forget to share and pin this post.

Enjoy the blog hop and Happy Paper crafting everyone

Tanya


tanya.armitage@me.com

0407581163

tanya.armitage.ctmh.com.au


All occasion card · Cards · scrapbook page layout · SOTM · Thin Cuts

La Vie En Rose Australasian blog hop

Hello and welcome aboard our Australasian Close to My Heart Blog Hop.

If you have arrived here from Denise’s scrap stamp share then you are in the right place.

If you landed here by accident, no problem, please join in by following the link at the end of this post.

Today I would like to share with you a creation which features Close To My Heart’s La vie en rose paper pack. I just love this paper pack. Not only is the rose page stunning but there are some black and white pages that can be very versatile and suit all ages and genders.

rosepage copy

I have kept this simple for a quick and easy layout. The idea is based on idea 2e from the Reflections how to book. This page would be great as either a title page or a left hand page. If you haven’t seen one of these how to books before I recommend you have a look at your consultants. They give you so many suggestions that can be modified for page layouts and can give suggestions for companion layouts that allow you to create amazing Double page spreads.

The images stamped are from  the January 2016 stamp of the month. I have added a bit of sparkle with the silver shimmer trim. As I stamped a border I felt it needed a border at the top too. As I have said this is quick and easy to do and can be modified to suit your needs. I hope you give it a try.

I have also created a card I hope you like. I have used cotton candy card stock to edge the card as well as white daisy for the bottom and the stamped image. The image is from the brand new Springtime Wishes stamp set. I have used the fantastic new Springtime Thincuts to cut out the shape of the flower and then have stamped the image onto the die cut. I just love our stamps being acrylic as it allows you to see where you stamp on the cut each time creating a near perfect fit. Watercolour pencils were used to add a light colour to the image.

I have cut along some of the petal lines on the bottom of the stamped image.  This is so that when I use the embossing tool it allows the paper to curl without tearing. Remember when you emboss to use the foam matt. The image below hopefully can show you the effect I was going for.roseclosecard copy

I have added a gem to the centre of the flower and coloured it to add a bit of bling. To hide the join of the white card and the paper I have used ribbon. Sometimes you do not want that hard edge of a join and ribbon or trim are great ways to hide this. When I stick ribbon to my cards or pages I use liquid glass. This ensures that it will not move.


rosecard copy

This card is very quick and easy to do. I love simple cards as they can be so effective and suit all crafting abilities.

Thank you for stopping by. Please leave a comment before you hop on over to view the fabulous ideas that Leah will share at Cameron’s Corner.

If you haven’t got a consultant already please contact me on 0407581163 or tanya.armitage@me.com

Happy Paper Crafting everyone

Tanya

All occasion card · Cards · SOTM · Uncategorized

Cards with a splash of colour

Hi everyone and welcome to my first post for 2016. I have much happening in my life to keep me busy. I have undertaken the role of activity coordinator for Tiny Tappers; a group that promotes coordination and confidence through dance/movement for children with disabilities. It is a wonderful group and will keep me on my toes all year.

Despite this I have made myself a promise to escape the stress of life through crafting rather than reading. So you will be seeing more of me. I am not sure if I will save money buy not buying books because I may just spend the money of new craft supplies. oh well but a lot of fun to be had.

Speaking of new craft supplies the new year has brought with it a new Seasonal Expression 1 idea book. You can view and download it from the link. As usual each month there is a new Stamp of the Month. This month it is the gorgeous Beloved Bouquet stamp set. This Stamp set is stunning and has so many uses. It will be one I will constantly use. You can purchase this stamp set for $7.50 with any qualifying purchase or for $27 full price but only through January.

jan16som

Sometimes you do not want to keep your cards simple. Sometimes I can find paper can distract from the impact of a stamped image. I am not sure if that is just me or if others find this as well.

I had a lot of cards to make before christmas and wanted some cards that were quick and easy. I came up with the below cards. The one on the left is coloured with watercolour pencils and the one on the right I left monochromatic. I personally feel that the monochromatic pops more against the colour than the other. What do you think?

I have sponged some colour across the middle of card and then stamped the image over the top. I have raised the flower just to give it some depth.

When I sponge I find I get the best results to add ink to my sponge and rub a little off on scrap paper first before I then apply it to the card. This helps eliminate the risk of getting splotches of heavy ink in some areas.

I also find putting pressure on the song and applying in a circular motion allows for a much smoother and even finish. I do like to stamp the envelopes and I have done so on only two corners of the cards.

If you would like the instructions to make this card please contact me via email: tanya.armitage@me.com

Below are some more cards I have made using the same style. As you can see they are simple but effective. Please comment and let me know what you think and share some of your own cards using this technique too.


I hope you all give this a try this weekend. Happy paper crafting everyone

Tanya Armitage

0407581163

tanya.armitage@me.com