All occasion card · Cards

“Little dreamer” Australasian blog hop

blogbadge

Hello and welcome aboard the Little Dreamer Australasian blog hop. If you have arrived here from Vandra’s Virtual CTMH Craft Room then you are in the right spot. If you have stumbled upon us or sent from my email list then please continue along the hop by clicking on the link at the bottom of this post.

          Today’s post features the absolutely stunning Little Dreamer Paper Pack. Screen Shot 2017-05-19 at 11.05.50 pm

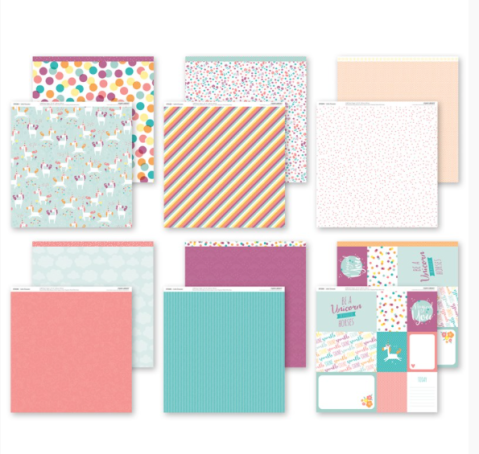
This Paper pack has some gorgeous designs and I am sure the amazing ladies in this blog hop will have some amazing ideas showcasing the versatility of them.

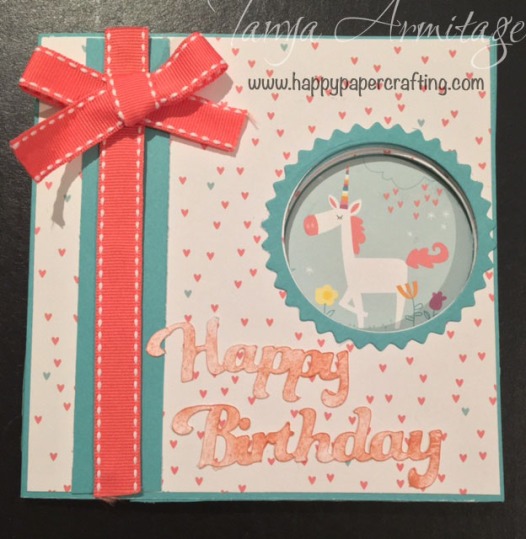
My design I am showing you today is a Peek-a-Boo card. These are cute and fun cards and can be used for so many occasions. The Peek-a-Boo cards have a window in the front of the card that when opens allows for another image to appear there. Here is what my card looks like closed and when opened. Note that the image visible in the window when closed in actually attached to the background card stock.

I am using this card for a young girls second birthday who loved hidden images in books so I thought this style card would be perfect for her. I wanted to keep the card child like so I kept it simple and used the glitter complements. What young girl does not like glitter?

Peek-A- Boo card using CTMH little dreamer paper packet

Inside image of peek-a-boo card using CTMH little dreamer paper packet and complements

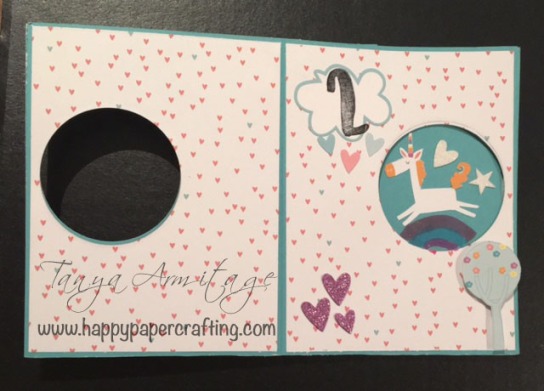
As you can see when opened the image that appears is a unicorn jumping over a rainbow. I fussy cut the paper and drew the rainbow on card stock and added bling from the complements pack.

The front of the card is decorated with Whimsy ribbon and cut outs using the cricut machine. The holes in the card were done using the Circle Thin Cuts, however you can do this with any shape thin cut.

I have added colour  to my Happy Birthday cut out with ink and sponge. If you wanted a brighter effect you could also use the markers or watercolour paints.

This card is really fun to make so give it a try.

Thank you again for coming along the ride of the Australasian blog hop. Please before continuing along our hop leave a comment. I know the other ladies will have some amazing ideas especially the talented Lauren Moore. Enjoy the ride and don’t forget to pin all the ideas for your inspiration.

Happy Paper Crafting

Tanya

Advertisement
All occasion card · Cards · Embossing · paper piercing

Paper Pierced Background card

Hello Everyone. I created this card after reading the close to my heart blog. They have a competition running at the moment. This is what I created. If you want to participate you can read all about it here.


I was inspired for this card by a 2008 card by Amy Sheffer on pinterest. The card featured a stamp that had stitching design background stamp. I loved the look but didn’t have a stamp similar in my collection for this project. So I thought outside the box and came up with this solution.

#cards4jeanette

I first used the Tone on Tone stamping technique on the cotton candy card stock. To stamp on the Daisy White card stock I stamped in versa mark. This was so that it was clear and not so visible on the final product. I used the  Great Job stamp set for the background.

Once it was stamped I then used the Piercing and Embossing Tool to pierce the design on the card stock. I followed the edges of the design for piercing. I also pierced a border along the edge of the larger Daisy White card.

I then Stamped the flowers from the Woodland Romance stamp set on both cotton candy and Daisy White scraps using Memento Ink. I used Memento ink as it dries fast so when I wanted to emboss straight after I wouldn’t damage the image. I then fussy cut the flowers out. To ensure the flowers would easily emboss I cut the petals down to the inner circle of the image. Turning the flowers upside down I used the embossing end of the Piercing and Embossing Tool. I pressed hard on each edge of the petal as well as the centre of each petal. I then turned them right side up and doing small circle motions got the flower to turn up. I then layered two alternate colours together using Liquid Glass.

I then stamped the Happy Birthday sentiment from the Joyful Birthday stamp set on the large white card. The flowers were then arranged and adhered to how I felt look right. I attached ribbon to the two smaller white card pieces and assembled the card.

This month we have Stampganza happening. If you purchase and 2 stamp set you will receive a 3rd for FREE.1603-cc-stampaganza

If you purchased all three stamps used for this project you would receive the Joyful Birthday stamp set of free.

Thank you for looking at this card. I am looking forward to seeing what you create for #cards4jeanette. I hope you all try these fun techniques

Full instructions are available for any of my projects with a purchase from my OBA.

Tanya Armitage

0407581163

tanya.armitage@me.com