Hello and welcome aboard our Australasian Close to My Heart Blog Hop.
If you have arrived here from Denise’s scrap stamp share then you are in the right place.
If you landed here by accident, no problem, please join in by following the link at the end of this post.
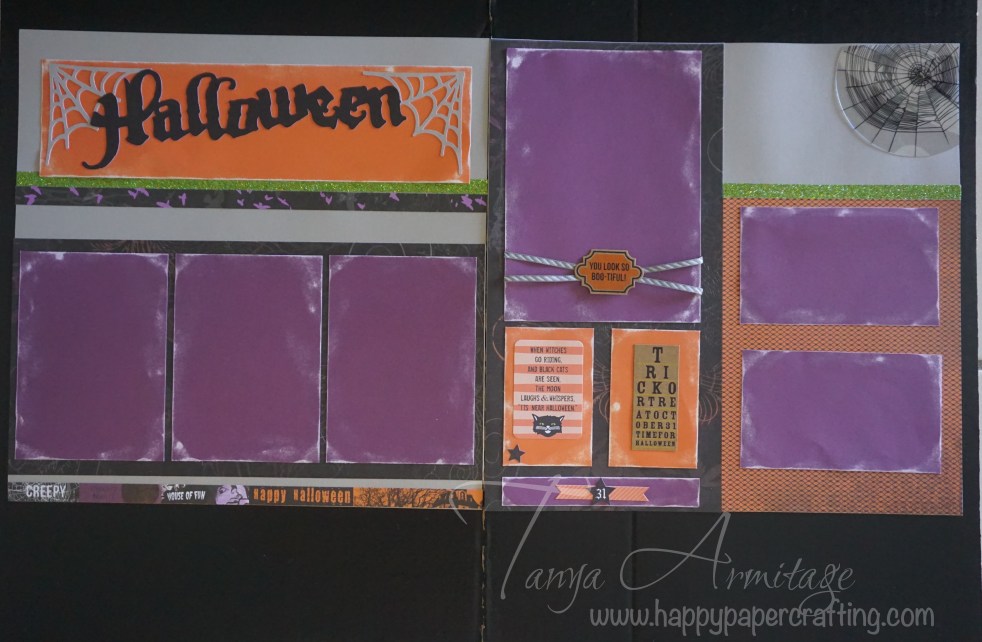
Today I would like to share with you a creation which features Close To My Heart’s La vie en rose paper pack. I just love this paper pack. Not only is the rose page stunning but there are some black and white pages that can be very versatile and suit all ages and genders.
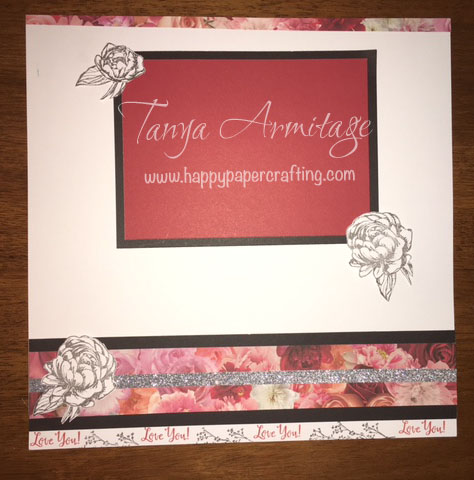
I have kept this simple for a quick and easy layout. The idea is based on idea 2e from the Reflections how to book. This page would be great as either a title page or a left hand page. If you haven’t seen one of these how to books before I recommend you have a look at your consultants. They give you so many suggestions that can be modified for page layouts and can give suggestions for companion layouts that allow you to create amazing Double page spreads.
The images stamped are from the January 2016 stamp of the month. I have added a bit of sparkle with the silver shimmer trim. As I stamped a border I felt it needed a border at the top too. As I have said this is quick and easy to do and can be modified to suit your needs. I hope you give it a try.
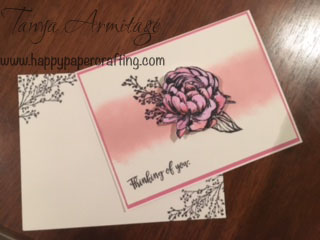
I have also created a card I hope you like. I have used cotton candy card stock to edge the card as well as white daisy for the bottom and the stamped image. The image is from the brand new Springtime Wishes stamp set. I have used the fantastic new Springtime Thincuts to cut out the shape of the flower and then have stamped the image onto the die cut. I just love our stamps being acrylic as it allows you to see where you stamp on the cut each time creating a near perfect fit. Watercolour pencils were used to add a light colour to the image.
I have cut along some of the petal lines on the bottom of the stamped image. This is so that when I use the embossing tool it allows the paper to curl without tearing. Remember when you emboss to use the foam matt. The image below hopefully can show you the effect I was going for.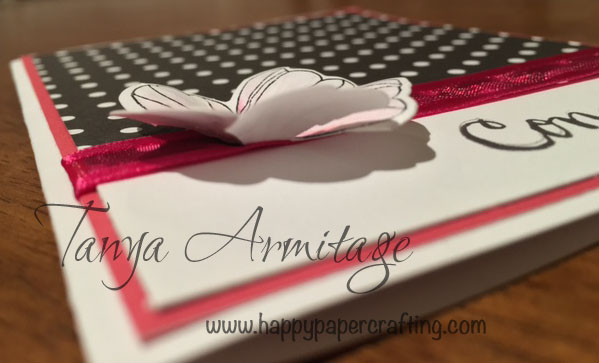
I have added a gem to the centre of the flower and coloured it to add a bit of bling. To hide the join of the white card and the paper I have used ribbon. Sometimes you do not want that hard edge of a join and ribbon or trim are great ways to hide this. When I stick ribbon to my cards or pages I use liquid glass. This ensures that it will not move.

This card is very quick and easy to do. I love simple cards as they can be so effective and suit all crafting abilities.
Thank you for stopping by. Please leave a comment before you hop on over to view the fabulous ideas that Leah will share at Cameron’s Corner.
If you haven’t got a consultant already please contact me on 0407581163 or tanya.armitage@me.com
Happy Paper Crafting everyone
Tanya