scrapbook page layout · Thin Cuts

CTMH Hello Lovely Blog Hop

blogbadgeHello and welcome aboard our Featured Paper Hello Lovely Australasian Close to My Heart Blog Hop. If you have arrived here from Mez wood’s aMAZing Close to My Heart Creations then you are in the right place. If you landed here by accident, no problem, please join in and follow the link at the end of this post.

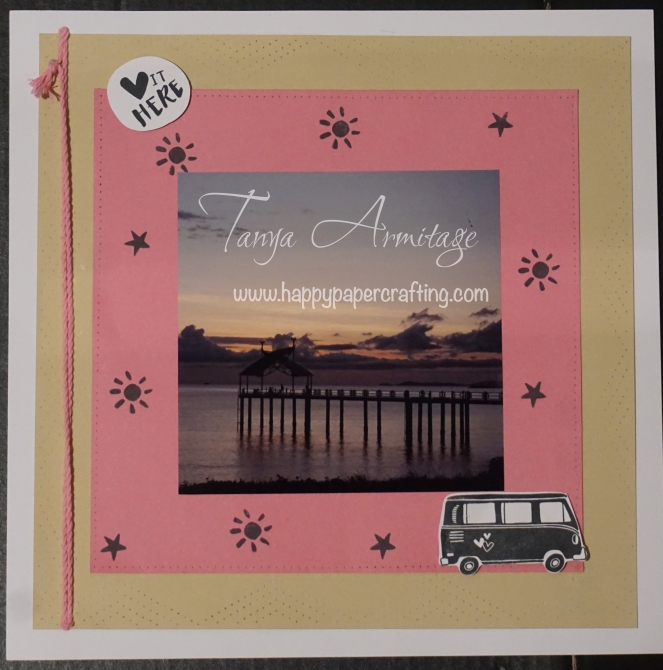
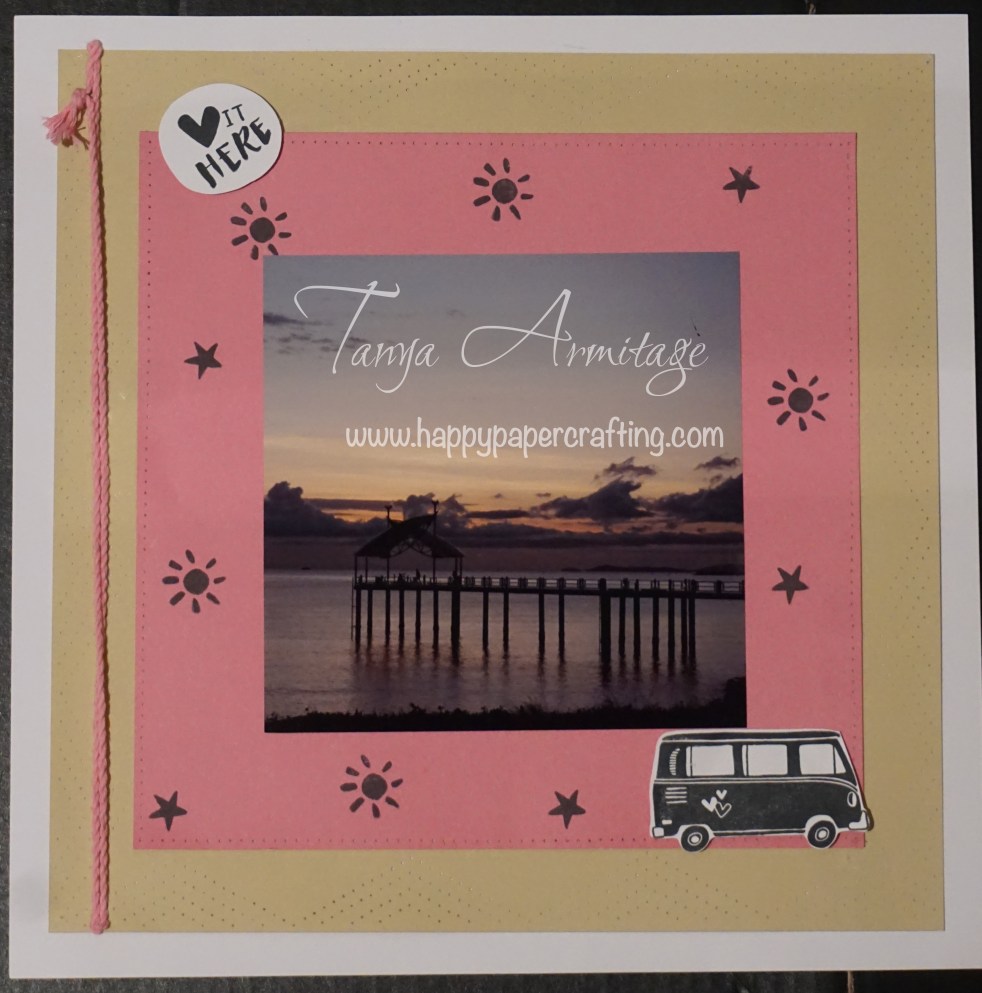
With yesterday being Valentines day I am sure you all have some wonderful photos you would like to preserve. Well today I would like to share with you this double page spread featuring the gorgeous Hello Lovely papers. I wanted to keep this layout simple and easy to complete so that even the beginners can give it a go.

hello-lovely

The page design is the Monologue design from the Imagine How to book. These how to books give you both the cutting guide and instructions for assembly. If you decide to follow this layout please note that I changed the 2nd B&T to colonial white card stock. Also I replaced cut “C” to shimmer trim.

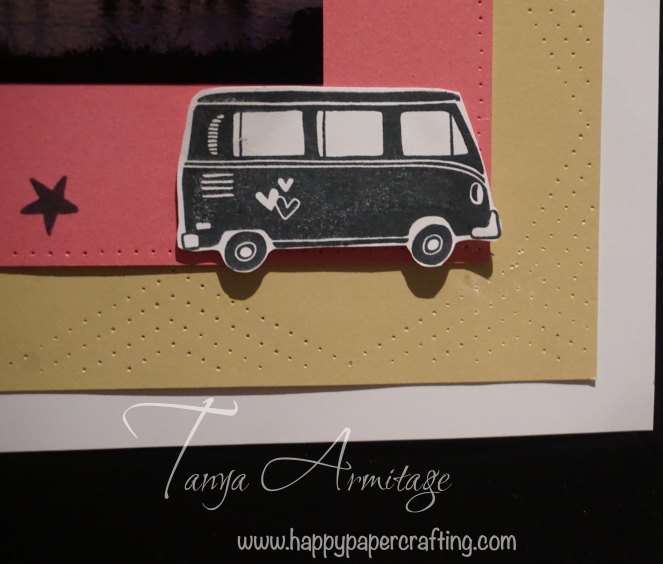
On the colonial white card stock I have used the Charming cascades stamp set. I used the top part of the stamp only to stamp the hearts on the card stock. I did this so that there was an even pattern. I have then cut out the title with White Glitter Card Stock using the Celebrate Thin Cut. The rest is as simple as glueing the pieces down as per the instructions.

The great thing about the how to books is  you can turn the look around just by rotating or switching the pages around as per the example below.

hello-lovely-switch

The Hello Lovely pages are gorgeous and can be used in so many ways. If you continue on this hop you will see some amazing designs. But before you jump along please leave me comment. Thank you, now take a look at another idea with  Lauren Moore at CTMH Crafting.

Happy Paper Crafting and we look forward to sharing more ideas with you

Tanya


Advertisement
albums/accessories · All occasion card · halloween · pocket scrapbooking · scrapbook page layout

Halloween Ideas

Halloween is on Monday and after all the fun and dress up is over you will have some fantastic memories you will want to preserve. You then have to decide how you will present them. Many People still do the traditional lay out. There are so many fun and interesting things you can do with traditional layouts to make them unique. The example below shows you that you can have your journaling box on an angle to create some interest on the page. 16-he-jeepers-creepers-monsters-layoutWashi Tape can be used in so many ways. Here it is used to to look like you have just stuck the pictures down. This is a great idea to use for children, school, friendship or crafting/work photos. It looks similar to having photos stuck over your mirror/wall.

16-he-jeepers-creepers-wyw-layout-01

The new way to scrapbook is one that I love. It is a mix of traditional and pocket scrapbooking. You still have your traditional scrapbook pages but you can use the new pocket pages to add additional photos similar to a photo album.

16-he-jeepers-creepers-wyw-pocket-pages

By doing this it makes scrapbooking quicker and easier and allows you to use many photos in less room. I will talk about pocket scrapbooking in a future post.

Once all your Halloween scrapbooking is done you don’t have to pack away the little monsters. Remember your own little monsters will love to make, give or receive some fun monster cards. 16-he-jeepers-creepers-wyw-card-set

I hope you all enjoyed the many ideas you can do with your halloween photos. Please share your completed ideas with me. Don’t forget to take a look at my other halloween ideas.

Happy Papercrafting everyone

Tanya


If you want any information about the above projects or other CTMH products please contact me on tanya.armitage@me.com. I am more than happy to provide you with free information.


All occasion card · paper piercing · scrapbook page layout · SOTM

The long way home Australasian blog hop

blogbadgeHello and welcome aboard the CTMH June 2016 SOTM Australasian blog hop. If you have landed here from Vandra’s Virtual Craft Room then you have arrived at the right spot. If you stumbled upon this by accident then never fear just click on the link at the end of this post to continue the hop to all the other fantastic ideas.

Every month CTMH release a stamp set just for that month. The Stamp set available for June is The long way home. It is a cute fun stamp that you will see on this hop is very versatile. Screen Shot 2016-05-31 at 11.22.36 pm

The idea I will be sharing with you today is a simple page layout inspired by page 63 from the Reflections how to book. I live in tropical North Queensland and one of our local beaches has great views at sunrise. I love living here and thought I would document what I love about my home town so that my future family can see what I love about it and how it changes. I would love to see your home town featured on your page.

I chose not to use a pattern paper for the background but did not want to use plain colour. So I created a bit of texture with the Stitch Guide and Piercing and Embossing tool. I used the triangle to create a fun pattern in the background card stock. I also pierced a border on photo mat with the piercing tool. This is a tool I love so much and have done a few projects using it to create fun backgrounds. Take a look here and hereJune16 SOTM piercing closeup.jpg

This is a very simple layout and is quick to do. I have stamped the sentiment Love it here  and the combi van and attached to my project with 3d foam tape. Then sun and star have been stamped onto the project. I have then finished the project off by attaching a strip of Twine. June16 SOTM page

I hope you have like this simple project and give it a go. Please feel free to share your page showing what you love about your home town. It would be great to see all the wonderful parts of our country.

This stamp set is $27 if purchased alone or just $7.50 with a qualifying purchase of $75.

Contact your consultant for more information or contact me here.

Remember this stamp set is only available until June 30 so be sure to grab this awesome stamp set before the time gets away.

Please leave a comment before continuing on to Creating with Kara Davies whom I am sure will have a fantastic idea to share.

Thank you for taking the time to look at my page idea. Enjoy the rest of the Blog Hop and Happy Paper Crafting

Tanya Armitage

tanya.armitage@me.com

Online Business Address <——–click here


albums/accessories · product review

What album do you need?

Hi everyone. If you haven’t heard yet Close to My Heart are having a sale on their albums until the end of May 2016. There are some great designs and these are all while stocks last. Take a quick look at the designs currently available here.

Close to my heart has two different types of albums. there are post bound and D ring albums. Each one has it’s Pro’s and Cons and you will need to determine your own requirements to choose the right album for your needs.

The D ring (3 ring Binder)

pro’s

  • Place the pages you are working on quickly away for protection
  • Add pages to your projects/albums quickly
  • change the order of your album easily.
  • Has clip at top, bottom and middle to help keep pages supported

Cons

  • Heavy projects can damage the rings.
  • Album is set width. May take up more room on shelf


Post Bound Album

  • heavy projects are best suited for these albums.
  • Can adjust the size of the album but adding or removing posts

Cons

  • Need to unscrew posts to add more pages or change order
  • need to remove pages to add others to create specific order


My favourite is the D ring only because I don’t work on projects in chronological order. These albums allow me add pages as I complete them quickly and easily.

If you do pages that have flip flaps or heaps of heavy elements on them or want an album to be a specific width, Then I would suggest you purchase the post bound albums.

If you already have an album let me know which one you love and why?

Screen Shot 2016-05-02 at 7.44.39 am

scrapbook page layout

CTMH Nevermore paper pack bloghop- Halloween layout and invite

Hello and welcome aboard our Australasian Close to My Heart Blog Hop. If you have arrived here from Shaunna Richards Passionate about Pages then you are in the right place. If you landed here by accident, no problem, please join in by following the link at the end of this post.

Today I would like to share with you my ideas with using the Nevermore Paper Packet. This Paper Pack is featured in the new Holiday expressions.

Halloween invite.
Halloween invite.

Around my area people will have a party for the kids so they can go around trick or treating together. This creates a bit of safety in numbers and also they give the neighbours warning so that there is plenty of fun for all those participating.

With this in mind I created this cute little invite.

I used Trick or Treat Sweets stamp set to stamp on the 1¼” square tiles. The corners have been removed from the tiles with the Corner rounder. My one tip for those making invites is when you finish them add a piece of magnetic tape to the back of it. This allows the recipient to place it on the fridge.

I have also created a double page spread using the Nevermore Paper Packet. When deciding on a design concept I look at the photo’s I want to use rather than trying to match photos after.  I have one photo I will be cutting into 3 parts. With that in mind I went hunting through the how to programs for a design that I found suitable. My final decision was to use 1a Master for the left side and 6h Alternate on the right from the Reflections How To Book. I liked these two designs together because there was an element that flowed from one page to another giving it continuity. For that element I decided to use the Green Shimmer Trim. It is a new product and works wonderfully with the colours of this pack.

I have used the Sanding Kit on all card stock. I wanted the misty/old look that is associated with Halloween and this tool gives these pieces that look. I just love it don’t you?  I also do this on old photos to help blend them into the design. The Halloween title is from the Artiste Cartridge, and the cobweb corners are from the Artbooking Cartridge.  To finish off these pages I have used the Nevermore Compliments and Slate Diagonal striped Ribbon.

Nevermore double page layout Thank you for stopping by. Please leave a comment before moving on to Expressions of the Heart by Wendy Hopper.

I hope you have been inspired to do some crafting of your own. Please feel free to contact me about any of my ideas or products.  Happy papercrafting everyone.